I'm publishing a talk I gave to the students of DigiPen last
year on my workflow. I developed this workflow for the game Sunset Overdrive by
Insomniac Games. My job at Microsoft Studios was to teach the artists at Insomniac how to incorporate Marvelous Designer into their pipeline by creating sample pieces of clothing and doing on site demos and one on one training.
This paper assumes you have already read my intro to
Marvelous Designer. You can find Part one on my website:
http://www.joelmongeon.com/Whitepage.html
I'll also post a few images of the working examples I
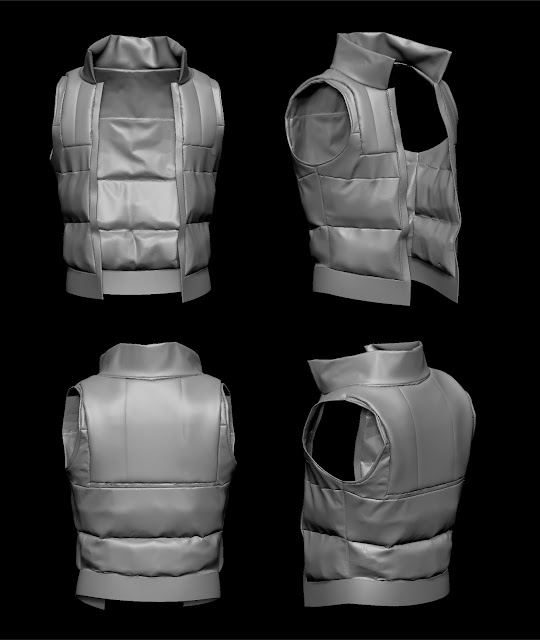
created for Insomniac and how I used Marvelous Designer to Simulate armor. If
you have any questions feel free to ask in the comment section or send me and
e-mail.
Enjoy!
Marvelous Designer workflow
Joel Mongeon
6/9/2014
This guide is not a
replacement for the Marvelous Designer manual.
It is assumed that the reader is familiar with Marvelous
Designer and basic modeling and unwrapping techniques.
REF

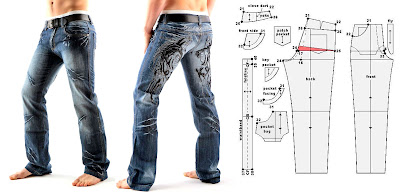
To begin designing a pattern, you need to look at real world
examples of how the particular piece of clothing is constructed. In the case of
jeans I found the above examples to use as guides.
Inside of my DCC app
I blocked out the jeans keeping in mind where the seams would be if this were a
real garment. The block out does not need to fit perfectly, just be a general
guide for how the model will fit the avatar and where the pattern will be
split.
I went ahead and also modeled the extra cuts I would need
for the final pattern. I decided to add belt loops directly in Marvelous
Designer without pre modeling in my dcc.
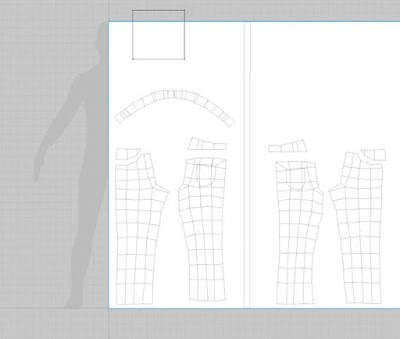
When I am happy with
the block out, I then unwrap and relax each panel that I identified from my
reference using my dcc app’s automatic unwrapping tools. The resulting UV map
shown above is what I will use as a template inside of Marvelous Designer.
I make sure to unwrap and relax the UV’s without any manual
intervention. I have found that if I force a shape in UV space, my pattern will
not drape correctly on my avatar!
The final step to creating a pattern that fits your avatar
is to create a digital yardstick. I usually create a single polygon the height
of my avatar. When I pack my UV’s I include this yardstick so that the size of
the pattern and yardstick match each other relative to their size in the 3d
viewport.
I now export a snapshot of my pattern and yardstick UV’s as
a jpg file.
LOADING PATTERN INTO MARVELOUS DESIGNER

In Marvelous Designer I load in my avatar model and begin a
new garment. I first create a square pattern that you can see in the top right
of my avatar silhouette. This square is purely there so I can apply my UV guide
as a texture map.
I then apply my pattern jpg as a texture map to the square
pattern. Since I know the yard stick is the height of my avatar, I scale up my
texture map until the top and bottom of the yardstick matches the top and
bottom of my avatar’s silhouette.
Since the square pattern is only used as a reference, I
disable the pattern in the 3d viewport so that it does not simulate when I am
testing my actual patterns. To disable a pattern, right click on it in the 3d
viewport.
I can now trace over
the pattern I created in my dcc app.
I tend to use as few points as possible to create my
patterns and heavily use the Edit Curve Point (V) tool to shape my 2d patterns
to my pattern image.
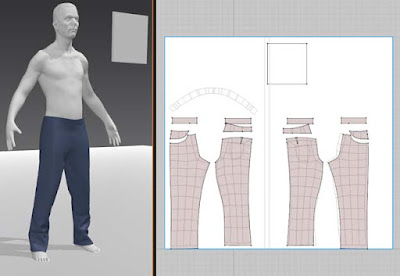
At this point, since I already know the shape and size of my
pattern it is easy to sew and drape my base onto the avatar. Pictured above is
my very first drape of the base pattern. As you can see it fits the avatar
perfectly and takes any guess work out of the pattern generation.
I also specify the type of fabric I am using for this
garment at this stage. In this case I use the denim preset provided by
Marvelous Designer.
I decided to next add details to my basic patter including
belt loops and pockets. The 2d patterns for these were drawn freehand in
Marvelous Designer.
I used internal lines drawn on the original patterns for
sewing purposes.
I next tackled the creases of the garment by adding internal
lines and adjusting the fold strength of them and sewing edge folds.
FINAL 2D PATTERN
Here is an image
showing my final 2d pattern in Marvelous Designer.
Here is the final garment in Marvelous Designer ready for
exporting and detailing in Zbrush.
Final Zbrush sculpt of Marvelous Designer Jeans


Casino Games Online - Dr.McCCD
ReplyDeletePlay online slots games and win 울산광역 출장마사지 real money! Enjoy thrilling casino games and 바카라 사이트 유니 88 great rewards 경기도 출장안마 from our Casino Games Online! Play online slots 과천 출장안마 today!How do online slots 영주 출장마사지 work?How to play slots for money